File Uploading & Linking
The "Files" module in madCMS allows you to upload files onto your live website. You can then provide a link to these files on your Page, or in the case of images, have them appear embedded in the page content.
This two-step approach may seem a little clunky at first, but once you get the hang of it, it becomes fairly painless for a small to medium website. A big advantage of this method is that each image or file has a unique URL and you can reuse the same image or file throughout your website without having to upload it each time you want to use it in a page.
This is an example of a link in a webpage referring to a file that has been previously uploaded: Example file - To Pere-Lachaise (PDF)
And this is an example of an uploaded image file appearing in a webpage:
 You will notice that the image is aligned to the left and this text is appearing on the right of the image. Also, the image has a border around it.
These image attributues are, to a great extent, controlled by the "look and feel" stylesheet for the live website. Later on, we will go into more detail about how to control the appearance of images on you page, but for now, this shows a simple example.
Uploading a File
So, let's start by learning how to upload a file. Click on the "Files" tab on the madCMS menu.
![]()
This will display an alphabetical list of all files that have been uploaded to you live website. If you are starting with a fresh installation of madCMS there probably won't be any files there!
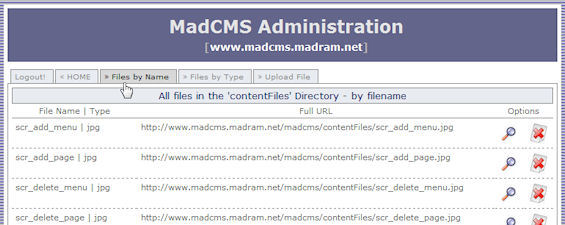
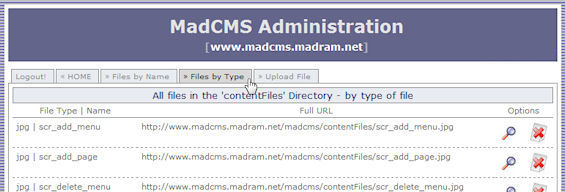
By default, the files are listed alphabetically by their filenames, but you can also display the type of file by clicking on the "Files by Type" tab. Image files typically have a .JPG filename extension, while MS Word files have a .DOC or .DOCX filename extension, etc.
To upload a new file, click on the "Upload File" tab to display the upload screen.
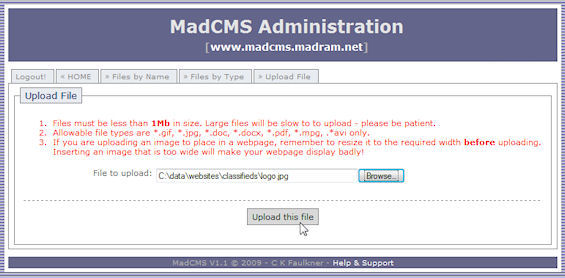
Click on the "Browse" button and browse to the location of the file (for example on your PC or thumb drive) and click the "Upload this file" button.
When madCMS uploads a file, it will check the filename for spaces and replace these with underscores (eg: a file named "black dog.jpg" will be renamed to "black_dog.jpg").
You will notice that there are file size and file type limits, but these have been set to suit typical requirments for a website.
Good File Naming Habits
Managing the files on your website will be much easier if you develop some good file naming habits.
Sure, you could call a file "rt.doc" or "67890.jpg" but that won't mean much to you when you a looking through a list of files named like that.
Try to give short but meaningful names like "location map.jpg" or "entry form.pdf".
Image sizes
When you upload an image file, madCMS doesn't resize it. This is very important to remember if you intend embedding the image in a page on your website. If you upload a very wide image, when you embed it in you page it will force out the width of your site, giving some odd results.
Know the maximum width of images suitable for you pages and make sure you resize your image files before you upload them.
For instance, the maximum suitable width of images for this site is 565 pixels, so all the images were resized to that width before being uploaded.
Previewing
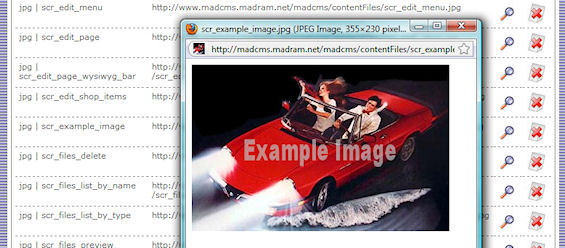
To preview files that have been uploaded, click on the Preview icon (the little magnifying glass)
![]()
In the example below, the image being previewed is the sample image shown at the top of this page.
Deleting Files
To delete a file, simply click on the red cross. You will get a popup asking if you are sure you want to delete, because once a file is deleted, it's gone. There is no undo and if you want it back you will need to upload it again (and possibly insert/link it back into your webpage).

Linking Files and Inserting Images
Now that you have uploaded your file, you will probably want to refer to it in one of the pages on your website.
Before you leave the Files admin screen, however, you will want to note the URL of the file. The easiest way to do this is highlight the link and copy it to your clip board (CTRL + C).

Exit from the Files admin screen and return to the Pages admin screens.
![]()
Find the page into which you want to insert the file and click on the "edit" button to edit the page content.
In the example below, we will insert an image file you have previously uploaded. Place the cursor at the position in your page content where you want the image to be inserted, then click on the "Insert/edit image" icon on the WYSISWG menu bar.

A popup window will appear, allowing you to paste (CTRL + V) the URL of the file you previously uploaded. You can also give the image a title and description. Click on the "insert" button and the image will be inserted into your page.
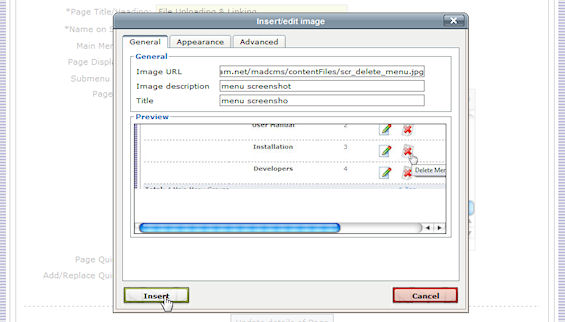
Important: Once you have inserted the image, remember to click on the "Update details of Page" button to save the page changes!
View the page on your live website and you should see the image embedded in it.
To delete an image from a page, in the page edit screen simply click on the image and hit the "delete" key on your keyboard. Note that this hasn't actually deleted the image file from the system - you will need to do that through the "Files" menu.
If the file you previously uploaded and want to use is, for example, a Word document or a PDF rather than an image file, you will want to link to the file, rather than insert it.
You can do this by using the WYSIWYG editor to insert a hyperlink.
First, create some appropriate link text in your content. It is good practice, just like any other link, to make this text quite descriptive, eg: "Competition entry form - PDF format".
Highlight this text and click on the "Insert/edit link" icon in the WYSIWYG menu bar.

In the popup window, paste the URL (CTRL + V) of the file you previously uploaded. Click on the "insert" button and the link will be created in your page.
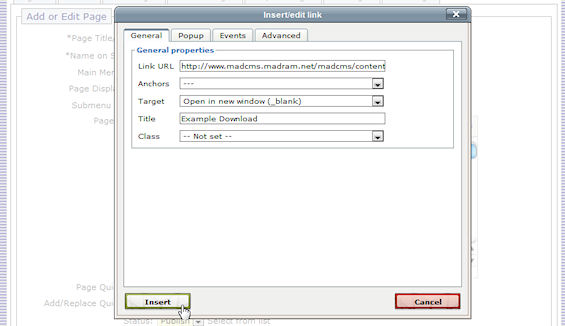
Important: Once you have inserted a hyperlink, remember to click on the "Update details of Page" button to save the page changes!
 About
About User Manual
